Venturing into the boundless, blocky realms of Minecraft on your Android device offers an unparalleled sense of freedom and creativity, accessible right from your pocket. Whether you’re a seasoned builder or a curious newcomer, understanding how to install Minecraft PE on Android is your first step into a world where imagination takes tangible form. This comprehensive guide will walk you through the essential steps, from securing the game through official channels to optimizing your device for the best possible experience, ensuring your journey into the infinite landscape of blocks is smooth and enjoyable.

Understanding Minecraft Pocket Edition (Minecraft PE)
Before we dive into the specifics of how to install Minecraft PE on Android, it’s helpful to clarify what “Minecraft PE” actually refers to in today’s gaming landscape. Originally launched as Minecraft: Pocket Edition, this mobile version of the beloved sandbox game has evolved significantly. Today, it’s officially known as Minecraft: Bedrock Edition, a unified version that allows players across various platforms—including Android, iOS, Windows 10/11, Xbox, PlayStation, and Nintendo Switch—to play together. This transition from “Pocket Edition” to “Bedrock Edition” happened with version 1.2.0 in 2017, streamlining the experience for a broader audience. The core experience remains: mining resources, crafting tools, building structures, and exploring vast, procedurally generated worlds.
Why Play Minecraft PE on Android?
Playing Minecraft on your Android device provides a unique blend of convenience and immersion. Imagine having the power to construct towering castles, delve into mysterious caves, or survive challenging nights, all while on the go. The flexibility of mobile gaming means your creative adventures are no longer confined to your home setup. You can pick up your world during a commute, share creations with friends in person, or simply enjoy a quick building session during a break. The Android version retains the iconic pixel-based graphics and block-based mechanics that define the game, offering a full Minecraft experience at your fingertips. This accessibility has made it a favorite for millions globally, fostering a massive community that thrives on shared creativity and exploration. Furthermore, the ability to engage in cross-platform multiplayer means you can connect with friends, regardless of whether they’re playing on another Android device, a console, or a Windows PC.
Official Method: Purchasing and Installing from Google Play Store
The most secure and recommended way to install Minecraft PE on Android is directly through the Google Play Store. This method guarantees that you receive the legitimate, updated version of the game, free from malicious software or compatibility issues often associated with unofficial downloads. The mobile versions of Minecraft are typically priced around $7 USD, offering a one-time purchase for the full experience. For Android users, a demo version with limited gameplay options is also available for free, allowing you to try before you buy.
To ensure you get the genuine article and understand exactly how to install Minecraft PE on Android officially, follow these detailed steps. This approach protects your device and personal information, while also ensuring you benefit from official support and updates from Mojang Studios, the game’s developer. When you purchase from the Google Play Store, you’re not just buying a game; you’re investing in a continually evolving experience with regular updates and a dedicated support team.
Step-by-Step Guide
Here’s the direct answer on how to install Minecraft PE on Android officially:
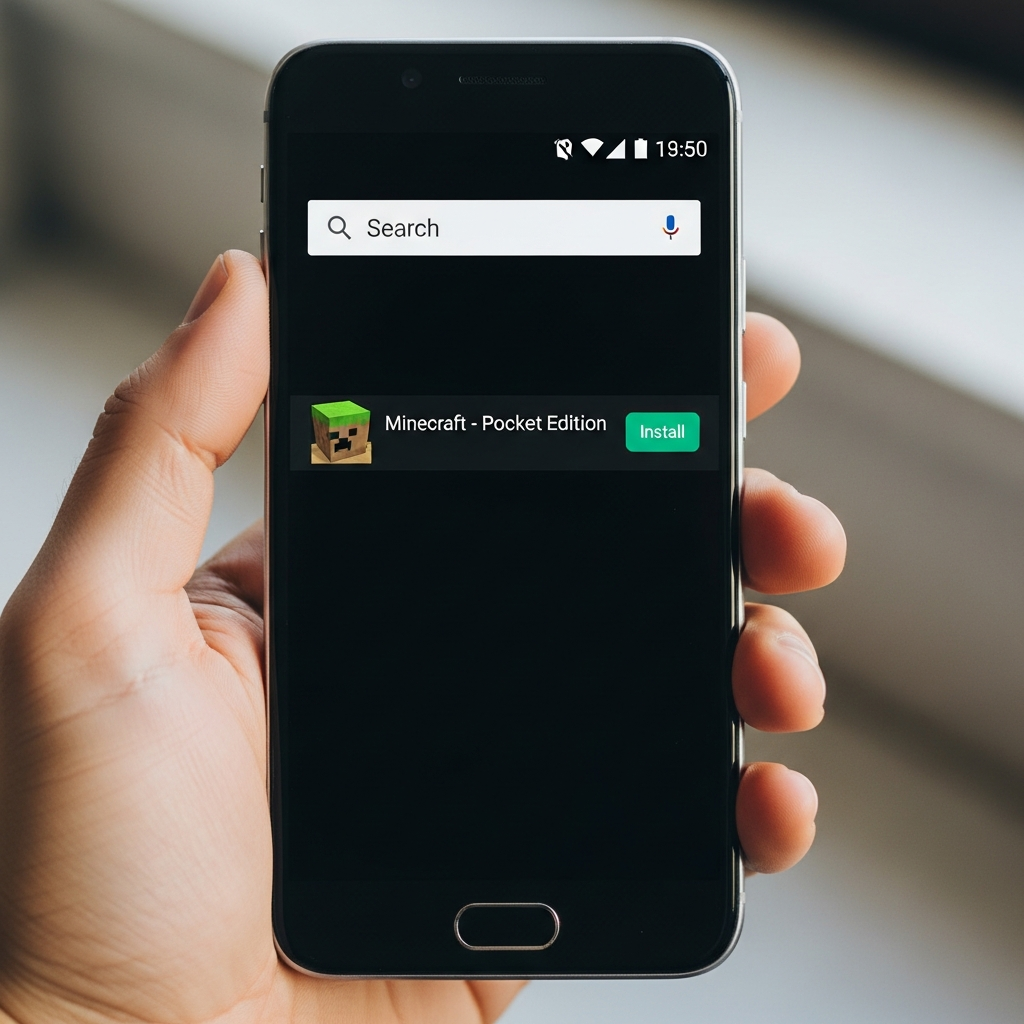
To install Minecraft PE on Android, open the Google Play Store, search for “Minecraft,” identify the official game by Mojang, tap the purchase button (around $7 USD), confirm your payment, and then tap “Install” to download and automatically set up the game on your device.
Let’s break down each step for a comprehensive understanding:
- Open the Google Play Store: Locate the Google Play Store icon on your Android device’s home screen or app drawer. It’s usually a colorful triangle. Tap on it to open the application.
Analogy:* Think of the Google Play Store as a vast digital marketplace, similar to a physical game store, but accessible instantly from your phone. It’s where all verified and safe Android applications reside.
- Search for “Minecraft”: Once in the Play Store, tap the search bar at the top of the screen. Type “Minecraft” into the search field and press the search button (usually a magnifying glass icon).
Example:* When you search, you might see several results. It’s crucial to look for the official game to properly install Minecraft PE on Android.
- Identify the Official Game: Look for the game simply titled “Minecraft,” published by “Mojang” or “Mojang Studios” (which is now part of Xbox Game Studios/Microsoft). The app icon typically features the iconic grass block. Be wary of unofficial “free” versions or knock-offs, as these are not the authentic game and can pose security risks.
Data Point:* As of recent updates, the official title for the mobile version is just “Minecraft,” signifying its inclusion in the unified Bedrock Edition.
- Check the Price and Tap to Buy: On the official Minecraft app page, you will see the current purchase price displayed on a prominent button (e.g., “₹650” or “$6.99”). Tap this button to initiate the purchase process.
Case Study:* Many new players overlook this step, sometimes mistakenly downloading a trial or a different game. Always confirm the publisher and the price to ensure you are about to install Minecraft PE on Android.
- Confirm Your Purchase: The Google Play Store will prompt you to confirm the purchase using your linked payment method. This could be a credit/debit card, Google Play balance, UPI, or other local payment options. You may need to authenticate the payment with a password, fingerprint, or facial recognition.
Security Note:* This authentication step is a vital security measure to prevent unauthorized purchases. Ensure your payment details are secure.
- Install the Game: Once the purchase is successfully completed, the button will change to “Install.” Tap this button (or the download might begin automatically). The game files will download and then install onto your Android device. The duration of this process will depend on your internet connection speed and your device’s processing power.
- Launch the Game: After installation, the “Install” button will change to “Play,” and the Minecraft icon will appear in your app drawer. Tap “Play” to launch the game and begin your adventure. You may be prompted to sign in with a Microsoft account, which enables cross-platform play and access to the Minecraft Marketplace.
Following these steps ensures you safely and legitimately install Minecraft PE on Android, paving the way for endless creative possibilities.
Ensuring Device Compatibility
Before you even think about how to install Minecraft PE on Android, it’s crucial to confirm your device can handle the game. While Minecraft is optimized for mobile, it still has specific system requirements to run smoothly. Meeting these specifications is key to avoiding lag, crashes, and an overall frustrating experience. Over time, as the game receives updates with new features and improved graphics, these requirements can subtly shift.
Here are the general minimum specifications for playing Minecraft Bedrock Edition on Android:
- Operating System: Android OS 9 or higher. Devices running Android OS 8 or below received their final update in March 2025 and will no longer receive new features or support multiplayer with updated devices.
- Memory (RAM): More than 1GB of RAM. While 1GB might allow the game to run, 2GB or more is generally recommended for a smoother experience, especially with other applications running in the background.
- Storage: At least 1GB of available storage space. This is for the game installation itself, but you’ll need additional space for saved worlds, texture packs, and future updates.
- Graphics: OpenGL ES 3.1 or higher. This ensures your device can render the game’s visuals correctly.
Practical Tip:* To check your device’s Android version, go to Settings > About Phone (or About Device) > Android Version. For RAM and storage, navigate to Settings > Storage and Settings > System > Developer options (if enabled, otherwise check ‘About Phone’ for RAM).
If your device barely meets the minimum requirements, you might experience occasional performance issues. For the best experience, especially if you plan on building large structures, engaging in extensive multiplayer sessions, or using numerous add-ons, aiming for recommended specifications will significantly enhance your gameplay. A device with a more powerful processor, higher RAM, and better graphics capabilities will provide more enjoyable and uninterrupted gameplay. Ensuring your device is compatible is a fundamental step in how to install Minecraft PE on Android successfully.
Troubleshooting Common Installation Issues
Even when following the official method to install Minecraft PE on Android, you might occasionally encounter hiccups. Don’t worry; most common installation issues have straightforward solutions. Understanding these can save you time and frustration.
Here are some frequent problems and how to address them:
- “Insufficient Storage” Error:
- Problem: This message indicates your device doesn’t have enough free space for the game files. Even if you have the minimum 1GB, updates and saved worlds require more.
- Solution: Go to your device’s storage settings and free up space. This can involve deleting old apps, large media files (photos, videos), or clearing cache data from other applications. Aim for at least 2-3GB of free space before attempting to install Minecraft PE on Android.
- Download Stuck or Extremely Slow:
- Problem: Your game download from the Play Store might freeze or take an unusually long time.
- Solution:
- Check your internet connection: Ensure you have a stable Wi-Fi connection. If using mobile data, confirm you have sufficient data allowance and a strong signal. Switching to a faster network can help.
- Clear Play Store cache: Go to Settings > Apps & notifications > Google Play Store > Storage > Clear Cache and Clear Data. Then restart the Play Store and try again.
- Restart your device: A simple restart can often resolve temporary network or software glitches.
- “App Not Installed” Error:
- Problem: This can occur if the download is corrupted, there’s a compatibility issue, or conflicting files from a previous (possibly unofficial) installation exist.
- Solution:
- Ensure compatibility: Double-check your device meets the minimum Android OS, RAM, and graphics requirements.
- Clear Play Store data: As above, clear cache and data for the Play Store.
- Uninstall previous versions: If you had an unofficial or older version of Minecraft installed, completely uninstall it before attempting to install the official Minecraft PE on Android.
- Payment Processing Failed:
- Problem: Your purchase might not go through due to incorrect payment information, insufficient funds, or a temporary issue with your payment provider.
- Solution:
- Verify payment details: Ensure your credit card number, expiry date, and CVV are entered correctly.
- Check funds: Make sure your chosen payment method has sufficient funds.
- Contact your bank/provider: Sometimes, banks flag transactions as suspicious. Contact them to authorize the purchase.
- Try a different payment method: If possible, attempt the purchase with an alternative payment option linked to your Google Play account.
By systematically addressing these common issues, you can navigate the installation process more smoothly and quickly get to the fun part of playing Minecraft.
Exploring Alternatives: Sideloading and Third-Party Sources
While the Google Play Store offers the safest and most reliable way to install Minecraft PE on Android, some users explore alternative methods like sideloading. Sideloading involves installing applications from sources other than the official Play Store, typically using an Android Package Kit (APK) file. It’s crucial to approach this method with extreme caution due to inherent risks. When considering how to install Minecraft PE on Android via sideloading, understanding these risks is paramount.
What is Sideloading?
Sideloading refers to the process of installing applications on your Android device from files (APKs) obtained outside of the Google Play Store. Think of it as manually putting an app onto your phone, rather than downloading it through an official app store. This method requires you to enable a specific setting on your Android device, often called “Install unknown apps” or “Unknown sources,” which is usually disabled by default for security reasons.
Historically, sideloading was a common way for users to access apps not available in their region or to install beta versions. However, with the widespread availability of apps in official stores, its primary use has shifted for many towards installing modified versions or applications from developers who haven’t listed their software on Google Play. While it offers a degree of flexibility, the trade-off in security can be significant, especially when dealing with popular games like Minecraft.
Risks Associated with Unofficial Sources
The dangers of downloading APKs from unverified third-party websites cannot be overstated, particularly when attempting to install Minecraft PE on Android. These unofficial sources often host files that have been tampered with, potentially exposing your device to severe threats.

Here are the primary risks:
- Malware and Viruses: This is the biggest concern. Unofficial APKs can be embedded with malicious code, including viruses, spyware, or ransomware, which can steal your personal data, damage your device, or hold your files hostage. Unlike apps from the Google Play Store, which undergo security checks, sideloaded apps from unknown sources bypass these protections.
- Security Vulnerabilities: Even if an APK isn’t overtly malicious, it might contain vulnerabilities that hackers could exploit. Without the rigorous testing and patching cycles of official releases, these versions can be insecure.
- Outdated Versions: Third-party sites may host old or unsupported versions of the game. These versions often lack the latest features, bug fixes, and performance improvements, leading to a subpar gaming experience. More critically, they may not be compatible with current multiplayer servers, preventing you from playing with friends.
- Compatibility Issues: Unofficial APKs might not be properly optimized for your specific Android device or operating system version, leading to crashes, graphical glitches, or poor performance.
- Lack of Updates and Support: When you install Minecraft PE on Android through unofficial channels, you won’t receive automatic updates. You’ll have to manually search for and install new APKs every time an update is released, which is tedious and continues to expose you to risks. You also lose access to official customer support.
- Legal and Ethical Concerns: Downloading copyrighted software from unofficial sources can be illegal and infringes upon the intellectual property rights of the developers.
Given these substantial risks, it is strongly advised to always prioritize the official Google Play Store when looking for how to install Minecraft PE on Android. The small purchase cost is a worthy investment for your device’s security and a guaranteed authentic gaming experience.
How to Safely Sideload (If Absolutely Necessary, Emphasizing Caution)
While the risks are significant, there might be rare circumstances where sideloading is considered (e.g., specific regional restrictions, beta testing programs from Mojang, or installing legally obtained older versions for specific purposes). If you absolutely must sideload to install Minecraft PE on Android, it is imperative to do so with extreme caution and only from highly trusted, verified sources, ideally directly from Mojang’s official channels if they offer such an option for specific programs.
Here’s a general guide, but remember, this method is inherently less secure than using the Google Play Store:
- Find a Reputable Source (Extreme Caution Here): This is the most critical step. Look for sources explicitly endorsed by Mojang or highly reputable Android enthusiast sites known for verifying APKs. Avoid random websites promising “free” or “modded” versions, as these are almost certainly compromised. Some users mention sites like `mcpedl.org` for APKs, but always proceed with skepticism and thorough research.
- Enable “Unknown Sources” or “Install unknown apps”:
- Go to your device’s Settings.
- Navigate to Apps & notifications (or similar, depending on your Android version).
- Tap Special app access (or a similar option like “Install unknown apps”).
- Find the application you will use to download the APK (e.g., your browser like Chrome, or your file manager).
- Toggle on “Allow from this source.”
Warning:* This setting significantly lowers your device’s security. Remember to turn it OFF immediately after installing the desired APK.
- Download the APK File: Using your chosen reputable source (if one is found), download the Minecraft PE APK file to your device. Ensure you have sufficient storage space.
- Locate and Install the APK:
- Open your device’s File Manager or “Files” app.
- Navigate to your Downloads folder (or wherever you saved the APK).
- Tap on the downloaded `.apk` file.
- Your device will ask for confirmation to install the application. Review the permissions it requests and proceed if you are comfortable.
- Follow the on-screen prompts to complete the installation.
- Disable “Unknown Sources”: Immediately after installation is complete, go back to Settings > Apps & notifications > Special app access > (your browser/file manager) and turn OFF “Allow from this source.” This restores your device’s security.
- Launch the Game: Once installed, the Minecraft icon should appear in your app drawer. Tap it to launch the game.
Remember, this method should only be considered as a last resort and with a full understanding of the elevated risks. For most users, the Google Play Store remains the safest and easiest path for how to install Minecraft PE on Android.
Optimizing Your Android Device for Minecraft PE
Once you successfully install Minecraft PE on Android, the next step is to ensure it runs as smoothly as possible. Even if your device meets the minimum requirements, optimizing your settings can significantly enhance your gameplay, reducing lag and improving frame rates. This is especially true for an expansive game like Minecraft, which can become hardware-intensive, particularly when exploring new areas or building complex structures.
System Requirements Revisited
Let’s quickly reiterate and elaborate on the core system requirements to fully grasp how they impact performance when you install Minecraft PE on Android:
- Operating System (OS): Android OS 9 or higher is the current baseline for receiving updates and ensuring compatibility with online features. Older OS versions (Android 8 and below) stopped receiving updates in March 2025, meaning they won’t have the latest features or be able to play multiplayer with updated devices. Always keep your Android OS updated to ensure the best performance and security.
- Memory (RAM): While 1GB RAM is the stated minimum, this is often barely enough. Minecraft: Bedrock Edition, especially with larger worlds, resource packs, or active multiplayer, can consume a fair amount of memory. For a truly fluid experience, 2GB to 4GB of RAM is highly recommended. More RAM allows your device to handle the game’s assets and background processes more efficiently, leading to fewer stutters and faster loading times.
- Storage: The game itself requires around 1GB of storage. However, your saved worlds, which can grow quite large with extensive building, as well as downloaded texture packs, add-ons, and future game updates, will demand significantly more. It’s wise to have at least 2-4GB of free internal storage available specifically for Minecraft-related content. External SD cards can store some data, but internal storage is typically faster.
- Graphics (GPU): OpenGL ES 3.1 or higher ensures modern rendering capabilities. A device with a more powerful Graphics Processing Unit (GPU) will render blocks, textures, and effects more efficiently, resulting in higher frame rates and a more visually appealing experience. Without adequate GPU support, even simple actions can feel sluggish.
Understanding these requirements isn’t just about whether you can install Minecraft PE on Android, but whether you can enjoy it without performance bottlenecks.
Freeing Up Storage and RAM
Optimizing your device’s resources is one of the most effective ways to improve Minecraft PE’s performance after you install Minecraft PE on Android. This involves actively managing your storage and RAM.
- Managing Internal Storage:
- Delete Unused Apps: Go through your app drawer and uninstall applications you no longer use. Many apps consume significant storage space with their data and caches.
- Clear App Caches: For frequently used apps, regularly clear their cache. Go to Settings > Apps & notifications > (select an app) > Storage > Clear Cache. This can free up hundreds of megabytes.
- Review Downloads and Media: Check your “Downloads” folder and large media files (photos, videos, music). Transfer them to cloud storage, an external drive, or delete unnecessary items. Large video files are often the biggest culprits for consuming space.
- Game Worlds: Minecraft worlds can become large. If you have old, unplayed worlds, consider backing them up to cloud storage and then deleting them from your device.
- Optimizing RAM:
- Close Background Apps: Many apps continue to run in the background, consuming RAM and processor cycles. Before playing Minecraft, swipe away all unnecessary applications from your recent apps list. This frees up memory specifically for the game.
- Restart Your Device: A fresh restart can clear out any accumulated temporary files and processes that might be hogging RAM, giving Minecraft a clean slate to run on.
- Limit Widgets and Live Wallpapers: These cosmetic features continuously consume RAM and CPU cycles. Disabling them can free up resources for the game.
By proactively managing these aspects, you ensure that when you launch Minecraft, your Android device can dedicate maximum resources to providing a smooth and responsive gameplay experience.
Graphics Settings and Performance Tips
After you install Minecraft PE on Android, adjusting the in-game graphics settings is paramount for achieving optimal performance, especially on mid-range or older devices. Minecraft offers a variety of visual options that can be tweaked to balance aesthetics with frame rate.
Here’s how to navigate the in-game settings for better performance:
- Access Video Settings: From the Minecraft main menu, go to “Settings,” then scroll down to the “Video” section.
- Adjust Key Settings for Performance:
- Render Distance: This is arguably the most impactful setting. It controls how many “chunks” (blocks of 16x16x16 meters) of the world are loaded and displayed around your character. Lowering this from the default (often 10-12 chunks) to a range of 5-8 chunks can dramatically boost your FPS. Start low and gradually increase until you find a comfortable balance.
- Simulation Distance: Similar to render distance, but it controls how far game mechanics (like mob AI, redstone, and crop growth) are active. Set this to match your Render Distance or slightly lower.
- Render Clouds: Turn this Off. While clouds add to the ambiance, rendering them consumes GPU resources.
- Beautiful Skies: Turn this Off. Disabling it can slightly reduce the processing load for sky rendering.
- Smooth Lighting: Turn this Off. Smooth lighting makes shadows more realistic but demands more processing power. Turning it off results in sharper, less nuanced lighting but better performance.
- Fancy Leaves: Turn this Off. This changes how tree leaves are rendered. “Fast” leaves are opaque and less resource-intensive.
- Fancy Bubbles: Turn this Off. Disabling this reduces the visual complexity of bubbles underwater.
- Graphics Mode: Experiment with “Fancy” vs. “Fast” or “Simple.” “Simple” graphics will significantly reduce visual details but can be a lifesaver for struggling devices.
- View Bobbing / Camera Shake: Turn these Off. While not directly performance-related, disabling them can make the game feel smoother by reducing visual distractions and potential motion sickness.
- Particles: Reduce “Particle Render Distance” or set “Particles” to “Minimal.” Excessive particles from explosions, torches, or weather effects can cause lag.
- Other Performance Considerations:
- Resource Packs: While custom texture packs can enhance visuals, high-resolution packs will demand more from your device. If you’re experiencing lag, try disabling any active resource packs or using a more performance-friendly one.
- Mob/Entity Count: Worlds with a very high number of entities (mobs, items on the ground, armor stands) can cause significant lag. Try to manage these in your builds.
- Redstone Contraptions: Complex redstone circuits, while fascinating, can be very resource-intensive. Simplify or optimize your redstone builds if performance suffers.
By diligently configuring these settings after you install Minecraft PE on Android, you can tailor the game to your device’s capabilities, ensuring a more enjoyable and consistent frame rate for your block-building adventures.
Post-Installation: What to Do Next?
Successfully figuring out how to install Minecraft PE on Android is just the beginning of your adventure. Once the game is up and running, a whole universe of possibilities opens up. From keeping your game fresh with updates to connecting with other players and exploring new content, there’s always something more to discover.
Updating Minecraft PE
Keeping your version of Minecraft: Bedrock Edition updated is crucial for several reasons. Each update typically brings new blocks, items, mobs, features, and often includes important bug fixes and performance enhancements. Playing on an outdated version can lead to compatibility issues, especially when trying to join multiplayer servers or play with friends who have the latest version.
Here’s how to ensure your game is always up-to-date after you install Minecraft PE on Android:
- Via Google Play Store (Recommended):
- Open the Google Play Store on your Android device.
- Tap on your profile icon (usually in the top right corner).
- Select “Manage apps & device.”
- Tap on “Updates available” to see if Minecraft has a pending update. If it does, tap “Update” next to “Minecraft.”
- You can also search for “Minecraft” directly in the Play Store, and if an update is available, the “Play” button will be replaced with an “Update” button.
- To enable automatic updates, go to the Minecraft app page in the Play Store, tap the three-dot menu icon in the top right, and check “Enable auto-update.”
- Via APK Sideloading (Use with Extreme Caution):
- If you originally sideloaded the game (which is discouraged due to risks), you will need to manually download the latest APK from your chosen (and hopefully verified) source each time an update is released.
- The process is similar to the initial sideloading: find the latest APK, download it, and then install it. Installing a newer APK over an existing one will usually update the game while preserving your existing worlds and data.
Reminder:* Always re-enable “Unknown sources” only for the download and installation, and disable it immediately afterward.
Regularly updating your game ensures you experience Minecraft at its best, with all the latest content and stability improvements.
Joining Servers and Playing with Friends
One of the most engaging aspects of Minecraft is its vibrant multiplayer community. After you install Minecraft PE on Android, playing with friends or joining public servers opens up entirely new dimensions of collaborative building, competitive gaming, and social interaction.
- Connecting with Friends (Local Network):
- If you and your friends are on the same Wi-Fi network, you can easily join each other’s worlds. One player hosts a world, and others can see it listed under the “Friends” tab in their game. This is a quick and simple way to enjoy local multiplayer.
- Minecraft Realms:
- Minecraft Realms is an official, subscription-based service from Mojang that allows you to host a private server for you and up to 10 friends. Realms are always online, meaning your world is accessible even when you’re not playing. This provides a consistent and private multiplayer experience across all Bedrock Edition platforms.
- To join a Realm, your friend (the Realm owner) will send you an invite code. You can enter this code within the “Realms” tab in your game.
- Public Servers:
- The game also features a dedicated “Servers” tab where you can find and join various public servers hosted by communities worldwide. These servers often offer unique game modes like minigames, survival challenges, or creative hubs.
- To join, simply select a featured server or add an external server by entering its address and port.
- Xbox Live Account:
- To play multiplayer with friends beyond your local network or to join Realms and public servers, you’ll need to be signed in with a Microsoft (Xbox Live) account. This account enables cross-platform play and helps track your progress and friends list.
Playing with others transforms the Minecraft experience, allowing for shared creativity and unforgettable adventures.
Exploring Mods and Custom Content
Once you’re comfortable with the base game, you might want to customize your experience further. The Minecraft community thrives on user-generated content, including mods, add-ons, texture packs, and custom maps. These can dramatically alter gameplay, introduce new features, or simply refresh the game’s visuals. When you install Minecraft PE on Android, you gain access to a vast ecosystem of such content.
- Add-Ons:
- For Bedrock Edition (which Minecraft PE now is), the primary method for modifying gameplay is through “add-ons.” These are typically files with `.mcpack` or `.mcaddon` extensions that can be easily imported into the game. Add-ons can introduce new mobs, modify existing item behaviors, add new weapons, vehicles, or even complex new game mechanics.
- How to Install Add-Ons:
- Download the `.mcpack` or `.mcaddon` file from a trusted source (e.g., `mcpedl.org` is a popular community site).
- Locate the downloaded file in your Android’s file manager.
- Tap the file. Minecraft should automatically open and import the add-on.
- Once imported, when creating a new world or editing an existing one, go to the “Resource Packs” and “Behavior Packs” sections in the world settings and activate the add-on.
- Important: For some advanced add-ons, you might need to enable “Experimental Features” within the world settings for them to function correctly. This is found under the “Experiments” section.
- Texture Packs/Resource Packs:
- These change the visual appearance of blocks, items, and the game interface without altering gameplay mechanics. They can range from subtle tweaks to complete graphical overhauls.
- Installation is similar to add-ons: download the `.mcpack` file and activate it in the “Resource Packs” section of your world settings.